

by guest blogger Mark Kintzel, designer
About this time every year, I long for those fresh-cut garden flowers—the tulips, peonies, and roses come to mind. Those are just a few of my favorites. But here in the Northeast, my personal favorites are still sleeping beauties waiting for that first breath of warm spring air.
Although the winter chill may still be all around us, that didn’t stop me from creating this spring-inspired arrangement of tulips, peonies, garden roses, tiny oranges, and eucalyptus recently. All of these flowers were collected at my local florist, including the tiny oranges. Here are a couple of little tips: Did you know that most grocery store floral departments will special-order flowers for you? Also, most florists discount their flowers on Saturdays. That way, they clean out their coolers to make way for fresh deliveries the following week.
I’d like to share a short floral tutorial so you can make your own warm spring inspiration…
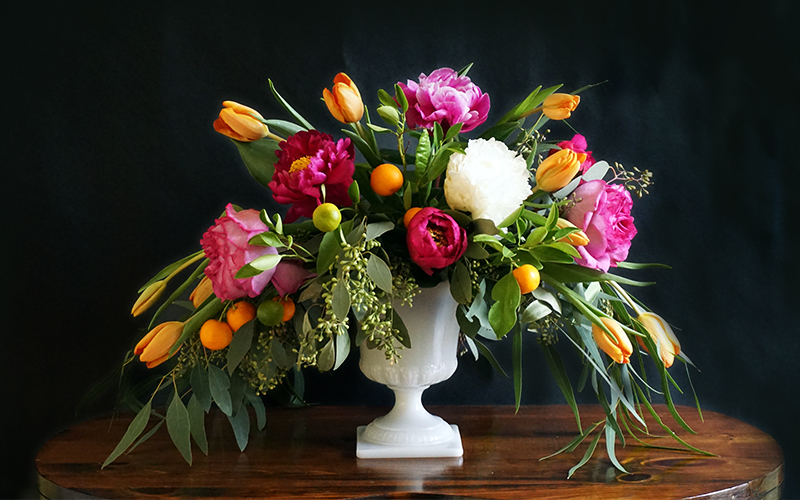
Spring Flower Arrangement in January
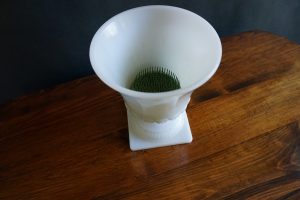
1. First, choose your vessel. Since I have an extensive collection of vintage milk glass vases, I’ll be using one from my stash, but be as creative as you wish. Vintage silver vases and old garden urns also provide beautiful bases for your floral work.
2. Your creation will require stability to hold the floral stems in place within the vessel. There are various ways to accomplish this, and unlike floral foam (which doesn’t decompose), all three of these methods can be reused again and again:

- You can create a grid using waterproof floral tape

- Or use a floral frog
- Or create a wire ball using floral chicken wire.

Floral tape, floral frogs, and floral chicken wire can be purchased from your local florist or craft store. You’ll need scissors, of course, to cut the stems of your flowers.
3. Prepare the flowers by removing the greenery that may come in contact with the water in the vase. Leaves left on the stem under the water line will rot, and bacteria will form in the water. So by cleaning the leaves off of the stems and replenishing the vase’s supply of fresh water regularly, you prolong the life of your arrangement.
 4. Prepare your support system of choice. I often prefer scrunching up a ball of chicken wire and inserting it into the vessel to provide the support for the arrangement. You’ll need a wire cutter if using this method. Then fill the vase with water about three-quarters full.
5. Now it’s time to have fun. Start the arrangement by filling the vase with greens. This will create the base for the shape of your arrangement.
6. Continue by arranging and adding in the remaining flowers, and add in any additional greenery as needed.
Have fun with your creation, and don’t be afraid to experiment with the unexpected, such as adding fruits or vegetables to your arrangement, or some greenery or seedpods clipped from your garden.
Let’s shake off winter and welcome a little spring into our homes. Who’s with me?
 Mark Kintzel comes from a long line of crafters, artists, musicians, and farm folk. He first came under the magic spell of flowers while wandering through meadows near his grandparents’ farm in Pine Grove, Pennsylvania, as a boy. His appreciation for creativity and flowers grew throughout the years, and he now specializes in event planning and styling, garden design, and organic floral arrangements for just about any occasion. See more at markkintzel.com.


I saw the picture of your arrangement on FB and I had to read your blog; and I’m so glad that I did!
Now I can’t wait for the snow to stop so I can buy flowers, tape and wire and try designing my own floral arrangement.
Thank you, Mark!